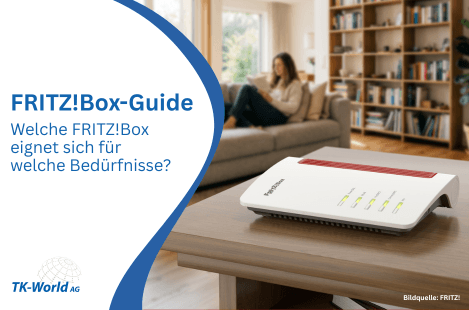
In our instructions, we refer to the setup of a FRITZ! Vodafone cable products. At https://fritz.com/pages/freie-rout erwahl you can also follow the alternative setup steps for other providers such as PŸUR , Telekom etc. or FRITZ!Boxes for fiber optic products.
Your customers live in Baden-Württemberg, Hesse or North Rhine-Westphalia (formerly Unitymedia)
1. have the FRITZ!Box activated
Before commissioning, the FRITZ!Box must be activated for the cable connection. To do this, contact Vodafone customer service by telephone and have the serial number and CM MAC address ready. The data can be found on the sticker on the FRITZ!Box or on the last page of the Quick Start Guide.
2. connect the FRITZ!Box
To connect the FRITZ!Box, the coaxial cable must be plugged into the cable socket of the FRITZ!Box and the other end into the data socket of the multimedia socket (socket for the Internet connection in the home). It is best to use the cable supplied.
🌐 3. set up Internet access
Call up the user interface of the FRITZ!Box to log in with the FRITZ!Box password from the nameplate. If the “Set up Internet access” menu is not displayed automatically, click on “Internet” and then on “Access data” to activate the “Internet access via the cable connection” option.
As soon as the “Power / Cable” LED lights up permanently, the Internet access setup can be completed: To save the settings, click on “Apply” or “Next” and restart the FRITZ!
Depending on the signal strength and connection configuration, it may take up to 10 minutes for the “Power / Cable” LED to light up permanently. If the “Power / Cable” LED flashes continuously, the cable connection has not yet been activated or is faulty. In this case, contact Vodafone.
4. set up telephony
Call up the login data for telephony in the MyVodafone customer portal (“Settings” > “SIP data”).
ATTENTION! Vodafone is currently switching telephony to a new system (Nokia IMS). If a SIP registrar xxxx.fixed.vodafone.de is named in the login data, the connection has been switched to Nokia IMS. In this case, the phone numbers must be set up as described in the Vodafone instructions by selecting “Other provider”.
Note: The Vodafone provider profile is to be adapted in the upcoming FRITZ!OS so that phone numbers can then be set up again via the Vodafone selection.
In the FRITZ!Box user interface, click on “Telephony” -> “Own phone number” -> “New phone number”. Select “Vodafone (BaWü)” or “Vodafone (NRW/Hessen)” from the drop-down list. Enter the login details that your customers have received from the provider in the input fields. Click on “Next” and follow the wizard’s instructions.
To assign phone numbers, click on “Telephony” again in the FRITZ!Box user interface -> “Telephony devices”. Click on the button with the pencil icon (Edit) for the relevant telephony device.
Important: If the telephony device does not yet exist, click on the “Set up new device” button and follow the wizard’s instructions.
In the “Outgoing calls” drop-down list, select the phone number via which the telephony device should make outgoing calls. If no phone number is selected, the outgoing number specified under “My phone numbers > Connection settings” is used.
Specify which phone numbers the telephony device should respond to for incoming calls. A maximum of ten phone numbers (including the phone number for outgoing calls) can be selected. Click on “Apply” to save the settings.
Your customers live in another federal state
📝 1. have your Vodafone customer number and activation code ready
Vodafone will send your customer number and activation code by post. If the activation code can no longer be found, it must be requested again from Vodafone. Activation codes can usually be used multiple times and are valid indefinitely. However, codes issued before October 2023 will no longer work.
2. connect the FRITZ!Box
To connect the FRITZ!Box, the coaxial cable must be plugged into the cable socket of the FRITZ!Box and the other end into the data socket of the multimedia socket (socket for the Internet connection in the home). It is best to use the cable supplied.
🌐 3. set up Internet access
Call up the user interface of the FRITZ!Box to log in with the FRITZ!Box password from the nameplate. If the “Set up Internet access” menu is not displayed automatically, click on “Internet” and then on “Access data” to activate the “Internet access via the cable connection” option.
As soon as the “Power / Cable” LED lights up permanently, the Internet access setup can be completed: To save the settings, click on “Apply” or “Next” and restart the FRITZ!
Depending on the signal strength and connection configuration, it may take up to 10 minutes for the “Power / Cable” LED to light up permanently. If the “Power / Cable” LED flashes continuously, the cable connection has not yet been activated or is faulty. In this case, contact Vodafone.
The Vodafone activation portal (https://kabelmodemaktivieren.vodafone.de) is then called up in the browser. The page may open with a slight delay. Enter your customer number and activation code there. Click on “Next”, after agreeing to use your own end device, click on “Activate cable modem” – the FRITZ!Box will then be activated by Vodafone.
After successful activation, Vodafone displays the access data for telephony. These should be saved as a PDF. Then click on “Apply” or “Next” in the FRITZ!Box user interface to save the settings and restart the FRITZ!Box to complete the Internet access setup.
4. set up telephony
Call up the login data for telephony in the MyVodafone customer portal (“Settings” > “SIP data”).
ATTENTION! Vodafone is currently switching telephony to a new system (Nokia IMS). If a SIP registrar xxxx.fixed.vodafone.de is named in the login data, the connection has been switched to Nokia IMS. In this case, the phone numbers must be set up as described in the Vodafone instructions by selecting “Other provider”.
Note: The Vodafone provider profile is to be adapted in the upcoming FRITZ!OS so that phone numbers can then be set up again via the Vodafone selection.
In the FRITZ!Box user interface, click on “Telephony” -> “Own phone number” -> “New phone number”. Select “Vodafone Cable” from the drop-down list. Enter the login data that your customers have received from Vodafone in the input fields. Click on “Next” and follow the wizard’s instructions.
To assign phone numbers, click on “Telephony” again in the FRITZ!Box user interface -> “Telephony devices”. Click on the button with the pencil icon (Edit) for the relevant telephony device.
Important: If the telephony device does not yet exist, click on the “Set up new device” button and follow the wizard’s instructions.
In the “Outgoing calls” drop-down list, select the phone number via which the telephony device should make outgoing calls. If no phone number is selected, the outgoing number specified under “My phone numbers > Connection settings” is used.
Specify which phone numbers the telephony device should respond to for incoming calls. A maximum of ten phone numbers (including the phone number for outgoing calls) can be selected. Click on “Apply” to save the settings.